ENGINE: Preheat | Smoke | Sam James Cowl | Electronic Ignition | Oil Cooler | Prop | Engine | Cowl Attach |
FUEL: Extended Range Tanks | Fuel Pickups | Fuel Valve | Tank Building | Rocket Fuel Vent |
ELEC: Antennae | Electrical | Battery Charger | Conduit | GPU | Rear Baggage Panel |
PANEL: Panel | Switch Layout | Panel Lighting | Fwd Bag Access Panel |
INTERIOR: Interior | Arm Rest | Five Point Harness | Removeable Floors | Headset Jacks | Ski/Golf Clubs | Cup Holders | Storage | Rear Seat Booster |
AIRFRAME: Canopy Lock | Steering Link | Rudder Cable Fairings | Oil Door | Trim/Flap Controllers | Wheel Pants | Brakes | Dynamat | Lighting | Tailwheel | Mapbox | Polishing | Covers | Cap Screw | Tinted Canopy | Parking Brake Idea | Control Locks | Gear Tower Mod | Bigger Wheels | Rud Pedal Mod | Gross Weight Increase |
MISC: Tail Lifter | Fuse Skin Rivets | Other |
Engine
PreheatTop
From 2010 or so:
“I’ve been hanging out in the garage recently with wind chills below zero (I know the wind isn’t blowing in the garage, but hey, I’m trying to be dramatic), and I’m thinking about the distant future of cold-starting the RV-7 [ed. now RV-8]”.
So, I’m documenting both the need and my current choice for preheat.
A cheap option ($55): Amazon.com: Kat’s 24150 150 Watt 4″x 5″ Engine Oil Pan Heater : Automotive

An expensive option ($708) From Reiff Preheat:
- Turbo & Turbo XP Systems
- These are like the Standard System below but “Turbocharged” with extra power for faster heating and colder climates.
- Turbo doubles the wattage on the oil sump (50 w per cylinder + 200 w on oil)
- Turbo XP doubles the wattage on the sump and the cylinders (100 w per cylinder + 200 w on oil)
- Turbo XP is our best system

Oh, and of course you’ll need a remote switch, but those are available everywhere today…
Smoke SystemTop
How cool would that be. I don’t know how hard or expensive it would be, but it would be cool. I stumbled across this video in youtube. Pretty cool.
Going for a Ride 1
Here’s another one:
Sam James CowlTop
I hear the Sam James cowls are fast, and I like the way they look. I haven’t realized price delta yet, but I think I might look into it. Here is the RV-8 cowl from Sam James.
Electronic IgnitionTop
Lightspeed Dick martin from RVBuildershotline.com article: “All the guys who go fast have Lightspeed ignitions. There’s a whole bunch of others out there, but they’Ave all used Lightspeed. He has the best. There is no such thing as a bad start. It starts like your car, especially if you live up north,” he says. Martin says an article in Sport Aviation a few months ago was “an excellent dissertation on the differences Lightspeed has ability to time intensity and duration of the spark so you get what you pay for. All of them will save you at least a gallon of hour in fuel consumption.”
Today, I’m thinking about dual pmags. the 114 series accommodates the 4-cylinder lycomings. more information here: https://emagair.com/
/.
Oil CoolerTop
From a VAF post:
I have one of the NonStop Aviation butterfly valves in my RV-10. Actually just got done installing it last week.Some observations:1) Very well made. 2) Ridiculously easy to install (30 minutes or less) 3) Uses a standard ACS 740 cable to move the valve from within the cockpit. 4) Works as advertised.The only negative I found with it was this:The manufacturer uses a small pop rivet as a stop for the butterfly valve to hit when it is fully closed. The problem is the rivet is too small and the valve can actually get stuck on the rivet.After installing it, I went out and flew the plane for several circuits in the pattern and found that by closing the valve about half way I could easily raise the temperature of the oil from 155F to 175F (pretty cold day). I then closed the door all the way and found that it was “stuck”. Not a big problem since in the five minutes it took to land the tempature only went up another 2 or 3 degrees.I took the cowling off and could see that when i closed the valve all the way the valve was stuck on the rivet. The easy fix was to drill out the rivet and replace it with a machine screw and a castle nut that sticks down further.So, overall I am impressed with the unit and am very happy with my purchase. Nothing against the more complicated designs including electronic ones, but this is a solution that begs for a nice simple design.Oh, one more thing. The NonStop Aviation unit comes with everything you need except one 4″ hose clamp.
For actual oil cooler, I stole this from a post on VAF (which was originally talking about how great the SW8406 oil cooler is):
“We originally had the Van’s supplied Niagara 7-row cooler on the RV-8 in my avatar. It was woefully inadequate for the heat-monster ECI Titan IO-360 engine (from America’s Aircraft Engines). Oil temps in the 230’s. We then installed a 13-row Aero Classics cooler (IO-540 sized) and I actually got it to fit on the rear cyl #4 baffle, but it was way too close to the engine mount, and also rubbed the fiberglass cowling a little. It cooled too well also, and was just simply overkill. The third cooler I installed is an SW10599R 9-row unit (~ $650). It cools just right in hot Texas summer heat, but had to fabricate a pilot-controllable air door to restrict airflow over the cooler for winter flying.
There is a much cheaper alternative to the expensive SW cooler… the Aero Classic 10-row cooler is just about the same exterior physical dimensions of the SW10599R and costs less than $260 from Spruce. For tighter spaces, they also make a 9-row cooler too, that would likely outperform the 7-row Niagara cooler by a significant margin.
The design and build quality of the SW coolers are definitely the best of all three brands I’ve tried, and if an extra $350 is not that big of a deal to you, then the SW is definitely the brand of oil cooler to get.”
Constant Speed PropellerTop
I’m pretty positive I want a 3-Bladed constant speed propeller, for a variety of reasons, some of which are:
- Speed
- Lack of vibration/noise
- Flexibility in climb/cruise
- Cool factor
The obvious choices are:
EngineTop
From Vans: “The RV-7/7A and RV-8/8A can accommodate O-320, parallel valve IO/O-360 (180 HP) , angle-valve IO-360 (200 hp) or angle-valve IO-390A engines up to 215HP” and “The XIO-360-M1B (180hp) and the XIO-360-A1B6 (200hp) use the forward horizontal induction oil sump and injector body permitting the use of Van’s “horizontal induction” cowl that does NOT require an external scoop on the lower cowl, as seen on our RV-7A, 8A and RV-14A demonstrator aircraft.”
Today a
YIO-360-M1B, 180 hp EA YENPL-RT2E10510 goes for $53,600.
YIO-360-A1B6, 200 hp EA YENPL-RT2E10512 goes for $63,000.
YIO-390-A3B6, 210 hp EA YENPL-RT2E10721goes for $64,400.
Why an IO-360?
I want the fuel-injected climb and cruise performance. I seem to be able to justify the extra cost at this point in the build (empennage), but I wish money were no object…then maybe I would be putting a 390 in there. Fuel injected is a must for me for a variety of reasons, safety and reliability are just a few of those reasons. Also, I’d like to do a build-it-yourself program.
A quote from someone on VAF: “The 180HP Parallel valve engine as a starting point is lighter, offers upgrades to 190HP+, than using the Angle Valve as the base. 160HP is still more than adequate for an RV-8.”
Still a lot of research to do.
There are a few shops authorized to build new Lycoming Experimental engines:
- Barret – Experimental Engines | Barret Precision Engines
- Aerosport power (Now Progressive?) – ABOUT AERO SPORT POWER LTD. — Progressive Air Group (They also have a build school at BUILD SCHOOL PROGRAM — Progressive Air Group)
- Ly-Con Aircraft Engines – Welcome to Ly-Con Aircraft Engines – Home
- Pinnacle Aircraft Engines – Aircraft Engine Overhaul and Repair – Alabama
- Continental Titan – Titan X-370 Experimental Engine | Continental Aerospace Technologies™
Cowl Attachment MethodTop
I know Van’s has you use hinge pins to attach the cowl, which gives a nice clean look. With that method, you have to have some way of attaching the hinge pin near the engine inlets. I like this, which I saw at the Mid-Atlantic Fly-in.


Or you can use 1/4 turn fasteners, like this:

I’m still not sure what I am planning, just capturing this stuff for future thought processing.
Fuel
Extended Range TanksTop
I don’t think I’ll really do this, but I thought it was an interesting idea.
From Mike Stewarts Extended Range Tanks page:
My first set of wings I built extended main tanks. Took the main tanks and added 2 bays to the main tank. This gave 30 per side. The generic plan is to order an additional skin with the kit along with an extra rear baffle, some extra z-brackets, and a few extra ribs. Just take a look at the preview plans and imagine extending the tanks and it will make sense.
I flew those tanks for ~1200 hours with no problems. But alias, I wanted even more fuel. Plan B. Full length leading edge tanks. Thanks to my good friend Patrick “Glider” Tuckey and his work on his 8, I had some ideas.
I have had plans where I wanted more fuel. Lots more fuel. 60 was not enough. Time for more.
I liked his ideas, with a few exceptions. I did not like using the existing outboard skin and making it a permanent deal riveted to the spar. Mine will surely leak on the first day and require me to remove the tank. Also in Gliders testing, he had no need for the transfer pump. So. on I went with those items in mind.
I decided that I would build 4 standard vans tanks. Simple, easy repair, easy parts. If I whack a deer, I build another standard tank. Hit a bird, build a standard tank. But how to get around the pesky pre-drilled holes in the spar for the outboard forward LE skin?
I did it this way. Build the tanks. Set the outboard tanks up on the wing spar. Align the outboard tank with the outboard skin. Use the holes in the tank skin as guides for drilling into the spar. Let the holes fall where they may. Its essentially what I did on my first set of wings for the 2 outboard bays. This will leave a nice ~4″ gap between the tanks for plumbing. Only the inboard tanks have indicators. This makes fuel flow accuracy more important than before.
Z-brackets. I used 2 sided tape. Let the Z-brackets fall where they may. Put zbrackets on rear baffle with solid rivets not bucked. Tape rivets in place. Your just trying to get the zbracket to stay in place. Put 2 sided tape on zbracket side facing spar. Set tank in correct place. Push down so the 2 sided tape hold zbracket in place. Remove tank and brackets are in the permanent place you want them. Drill into spar web and your alignment is good to go.
Plumbing. In my installation, the engine only gets fuel from the inboard tanks. Further, the inboard tanks only vent to the outboard tanks. If there is fuel in the outboard tanks, it will get pulled into the inboard. Only the outboard tank is vented to the outside air. Testing has proved this to work fine. My outboard tank vent, vents at the fuse in the normal vans location. Note: Since a very sealed tank is now mission critical to the success of this senerio, the Vans usher caps are junk and had to go. I went with some double sealed locking caps from ACS. I must have caps that will NOT leak or I wont get the fuel pulled into the mains.
While I was building new wings, I went ahead and went with single piece top skins. Just cause.
But wait. 4 RV-8 tanks are only 84 gallons. Where is the other 13? Well I went ahead and built the same in wing smoke tank as before. Only this time I plumbed it so in case I ever need it to double as a fuel tank, its ready to go.
You dont get no build pictures cause I didnt take any. Its just 4 tanks on the leading edge of the wing.
Did the wings slide into the fuse and the bolts line up? Like butter. When I lined up the plane to drill the rear spar, it required no wing movement/adjustment at all. Both sides perfect. Drill hole, done. A testament to the repeatability of the pre-punched Vans products.
Here are a few finished pictures. You will notice the cover strip in the first picture covering the plumbing area.
He’s got four pictures up there:


Here are the parts I think it will take:
| Part | $ Est | $ Act | Date |
|---|---|---|---|
| Skins | |||
| T-00701-L-1 Fuel Tank Skin, Left (W-00723) | – | $216.14 | 7/7/26 |
| T-00701-R-1 Fuel Tank Skin, Right (W-00723) | – | $216.14 | 7/7/26 |
| Fuel Tank Baffle, Left T-702-L | – | $56.39 | 7/7/26 |
| Fuel Tank Baffle, Right T-702-R | – | $56.39 | 7/7/26 |
| T-00712B-2 z brackets x10 | Not required, see next | – | – |
| .063″ T6 Z Channel 1.125″ x .625 x 18″ x 4 | $24.36 | 7/7/26 | |
| Ribs: | |||
| T-703-L x 2 end ribs | $37.12 each, $74.24 | ||
| T-703-R x 2 end ribs | $37.12 each, $74.24 | ||
| T-804-L x 4 interior ribs | $75.08 each, $300.32 | ||
| T-804-R x 4 interior ribs | $75.08 each, $300.32 | ||
| T-410 x 4 nose reinforcement | $17.19 includes tank ring, $68.76 | ||
| T-405 x2 (angle support) | Not required | – | – |
| T-711A x4 Stiffeners | 4 @ $16.16, $64.64 | $64.64 | 7/7/26 |
| Misc: | |||
| T-714 x2 vent clip | NR, make from scrap | – | – |
| T-00007-1 Fuel cap and flange x 2 | $102.03 each, $204.06 | ||
| T-708 Without Sender Hole x 2 | $26.12 | 7/7/26 | |
| T-407 x2 Tank ring | (with T-410) | – | – |
| CAV-110, VA-112 Tank Drain and Flange | $64.45 | 7/7/26 | |
| T-715 x2 anti-rotation bracket | $16.16 | ||
| Hardware: | |||
| (210) AN509-8R8 & (210) K1100-08, BAG 1922-1 | – | $131.45 | 7/7/26 |
| AN515-8r8 screws | |||
| (52) AN3-4A view & (52) K1000-3, BAG 823-1 | – | $32.08 | 7/7/26 |
| AN3-4A bolts | |||
| 52 x AN960-10L washers (NAS1149F0332P) | |||
| SB437-4 Snap Bushings, BAG 955 | – | $0.75 | 7/7/26 |
| Bulkhead Fittings: | |||
| AN833-4D x2 bulkhead fitting fuel vent | $21.48 each, $42.96 | ||
| AN Spacer x 2?AN924-4D nut x 2 | $1.88 each, $3.66 total | ||
| AN818-4D nut x2 | $2.15 each, $4.30 | ||
| AN819-4D sleeve x2 | $1.34 each, $5.36 | ||
| AN833-6D x2 bulkhead fitting fuel feed | $30.07 each, $60.14 | ||
| AN924-6D nut x 2 | $2.74 each, $5.48 | ||
| AN818-6D nut x2 | $2.15 each, $4.30 | ||
| AN819-6D sleeve x2 | $1.61, $3.22 | ||
| Table Footer | |||
Calculator shows $1,773.06.
I snagged a picture of the overall wing layout, then did a little movie magic to overlay a duplicate tank along the outboard wing skin edge. Here’s what that looks like:

It wasn’t too hard to overlay, and I think all the z-brackets will be easy to place along the main spar, but I do see a problem.

The inboard z-bracket needs to sit right where the tiedown bracket is. And the tiedown bracket holds the aileron bellcrank in place. Maybe I can just flip the z-bracket? Hmmm.
Prefabricated Fuel Pickup TubeTop
Prefabricated Fuel Pick-Up Tube from Vans for $15. Apparently these are nicer than the customer built ones.
Installs inside fuel tank, replacing scratch built unit shown on plans. Complete with AN fitting and stainless steel finger screen. The screen is the thing that is better. On the customer built ones, it is an AN fitting with some saw cuts in it that necessitates an inline fuel filter downstream.

Andair Fuel ValveTop
Andair fuel valve……almost everyone thinks they are worth it.
Beautifully crafted valves made by RV (and Airbus component) builder Andy Phillips. Lifetime materials, compatible with all fuels. The FS20x7T valve has a 90 degree swing and a positive “lift and turn” feature to prevent inadvertently selecting the off position. 90 degree AN6 elbows are installed to facilitate typical RV installations. The FS20x20-3 valve has the same features but is a dual valve with 180 degree swing, 3/8 NPT ports for fuel supply and ¼ NPT ports for fuel return to the selected tank. Usually used with automotive engines that require fuel return to the tank, not required for typical aircraft fuel injection systems.
The 90 degree version is $205 and the 180 degree version is $365.

Tank Building SequenceTop
Tips from Mike Cencula in a VAF forum reply:
My sequence was something like this:
Cleco / match drill everything
Drill and test fit all holes for fittings, BNC connector, outboard and inboard rib nose doublers, trap door, anti-chafe strip / anti-hangup strip
Disassemble / debur / dimple everything
Rivet stiffeners
Block off the 1 1/2 diameter hole in the rib where the flop tube goes
Rivet on all rib accoutrements (doublers, trap doors, etc)
Rivet all ribs
Rivet filler neck
Install vent line
Install flop tube
Install capacitive sender plates
Run wires / install BNC connector
Install baffle
Rocket Style Fuel VentTop
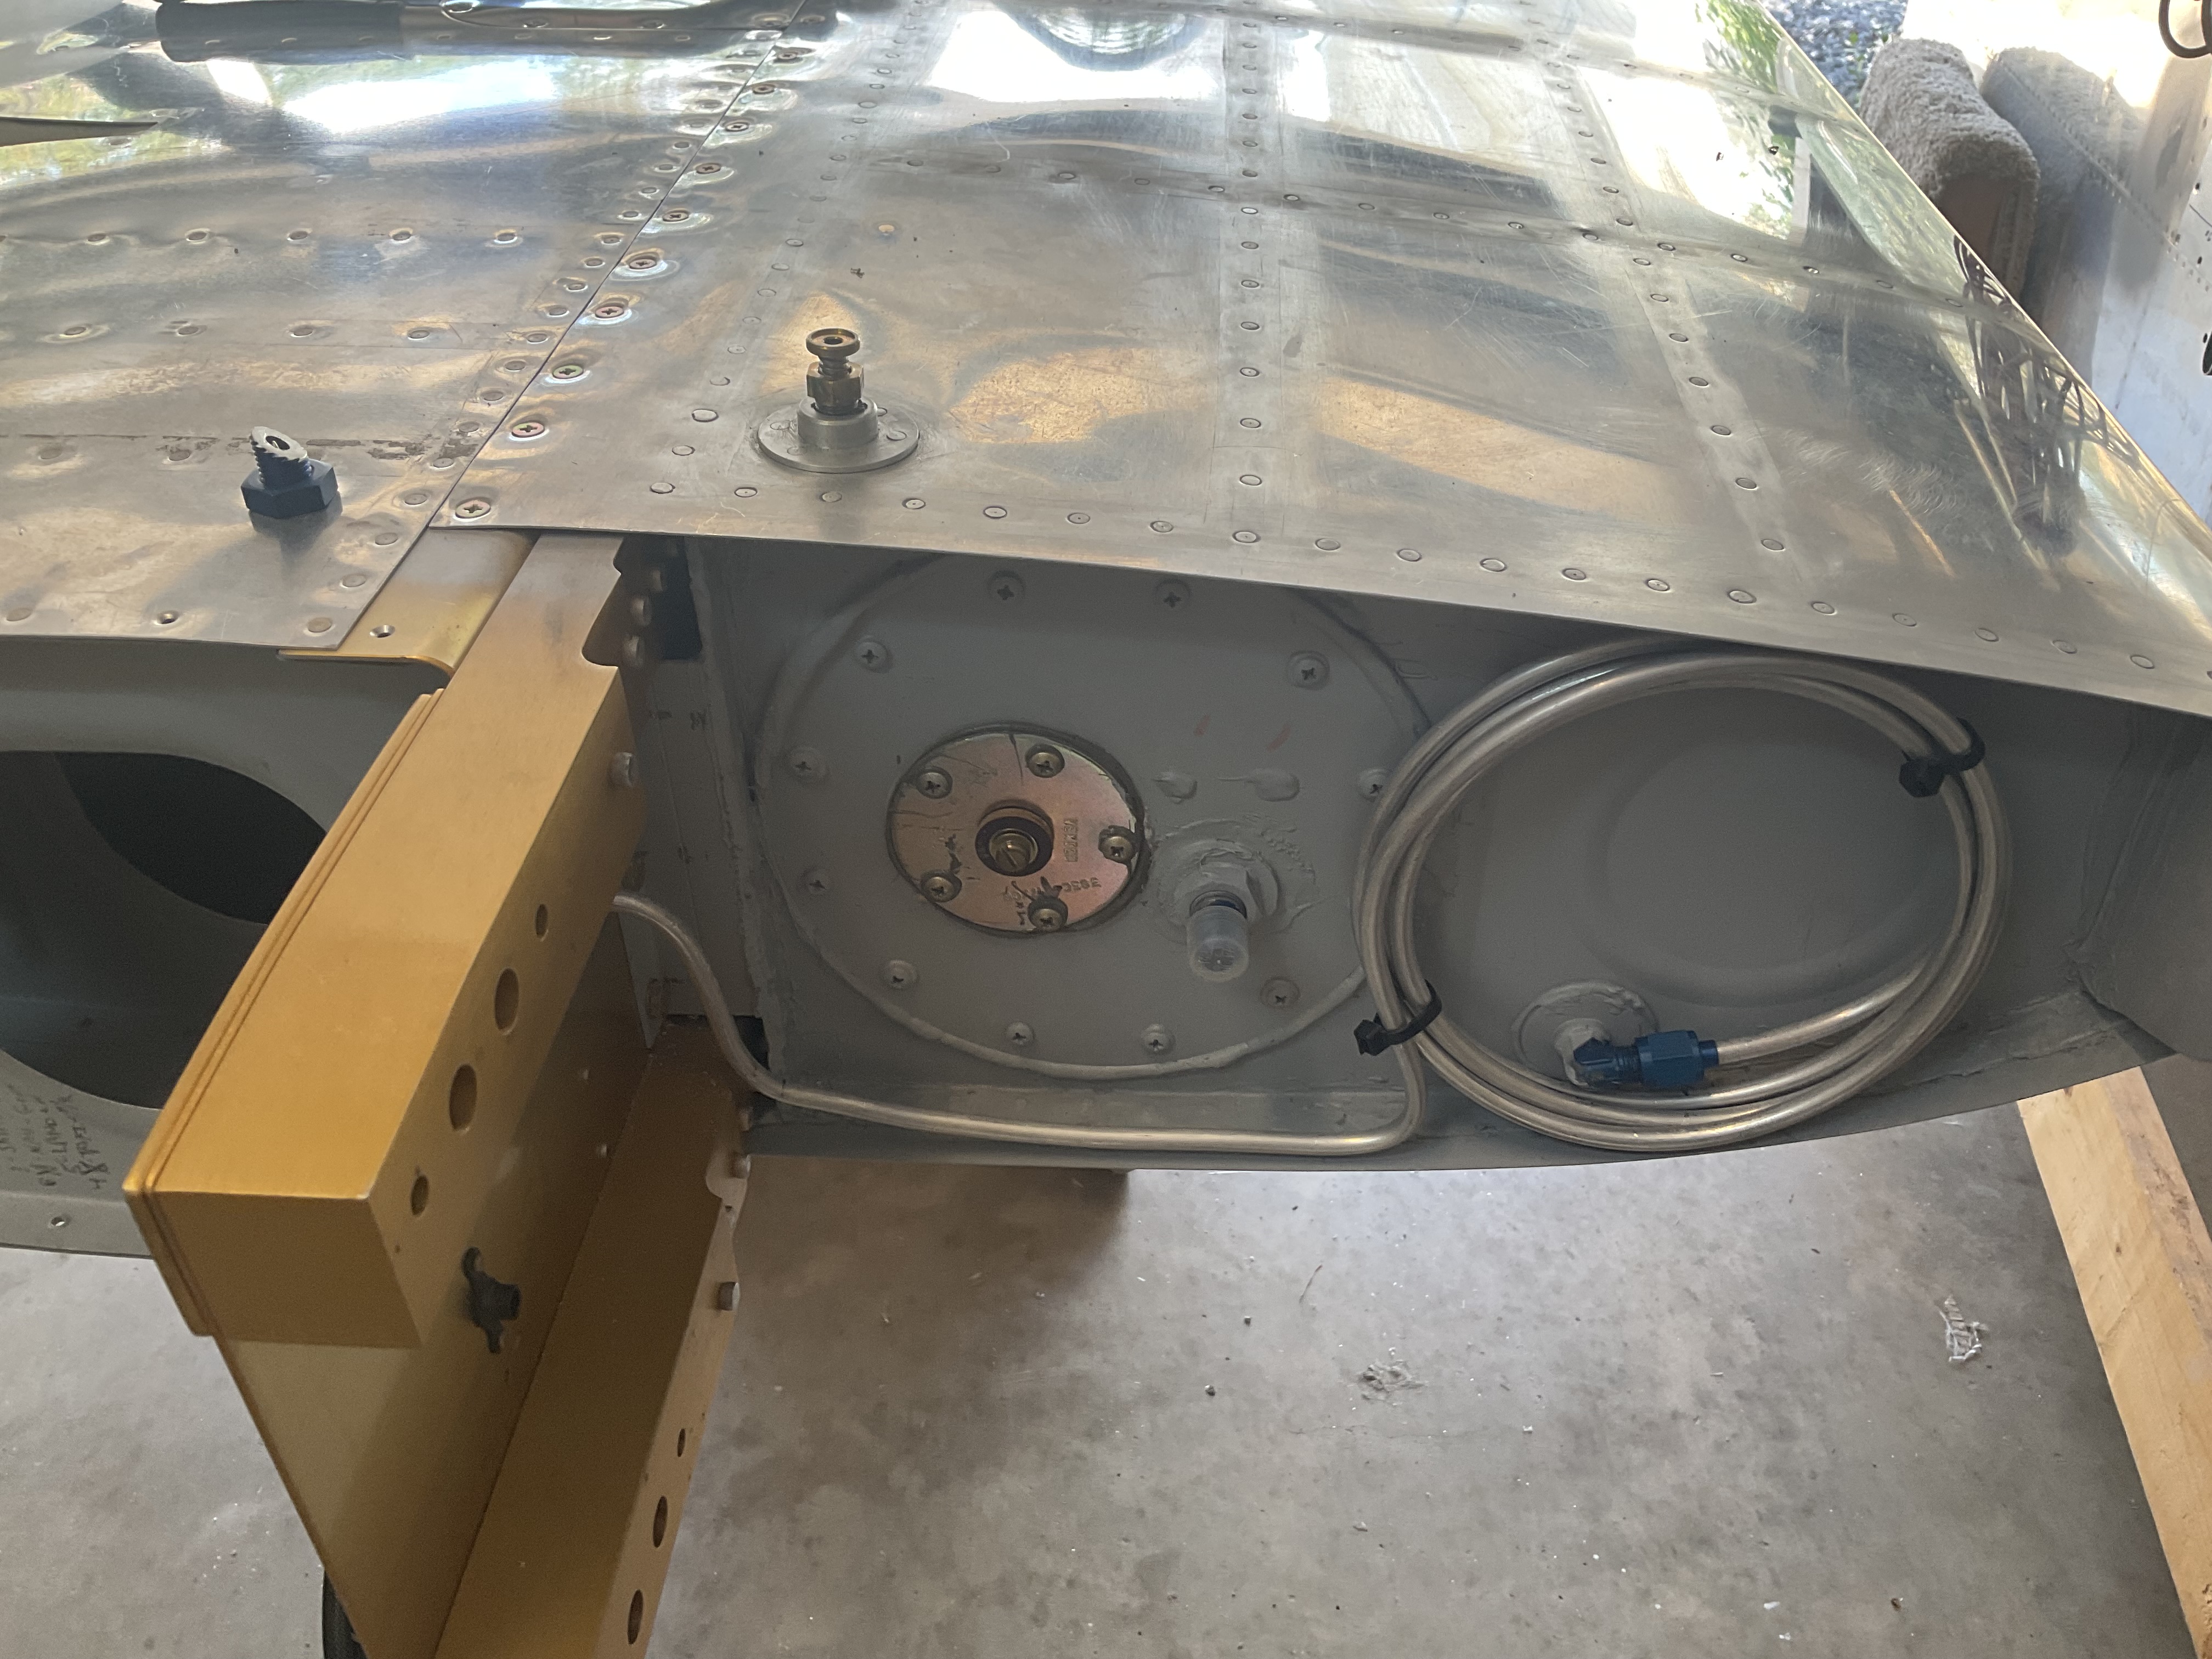
Here is the rocket style fuel vent. But I probably won’t drill a new hole in the spar web as shown in the second picture.

Electrical
AntennaeTop
Saving for future consumption:
Bob Archer Wingtip Nav Antennae – $125 each, need 2.

RAMI AV-17 COM ANTENNA – $185 each, need 2.

Electrical ArchitectureTop
Here’s the latest electrical system architecture. Go to the Cockpit Design page for more background.

Well, I have a whole essay written about this. I’m going to post it as a post, then copy it here for history purposes.
I am planning on fuse blocks under the panel, though. Here’s a link to something I will copy: https://vansairforce.net/threads/hinge-fuse-panel-layout.96214/#post-742921
Battery Charger LocationTop
This was a cool idea I snagged from Fred Bauer, Jr on his RV-3B. I snagged this picture from his picasa album. I think it would be helpful to have a battery charger plug. I don’t know if it needs to be a GPU plug for starting amperage, but maybe just a small one. (Plane is dead, I can’t start it from a GPU, but I’d have to wait an hour or two for a battery charge.

Conduit RunsTop
Conduit for later wire runs. I trust these are worth the effort. More later.
I snagged this of of Mike’s site:
A whole lot of wire was consumed tonight! I ran wires for the wingtip landing light, taxi light, nav light and strobe. I am planning on putting in the Duckworks MR16 50W HID landing the taxi lights, and the AeroLEDs Pulsar NS90 navigation/strobe LED lights. This took a total of 6 wires. Two 16 gauge wires for the landing/taxi lights, two 18 gauge wires for the strobe ground wires, a 20 gauge wire for the navigation light and a 22 gauge wire for the strobe synchronization signal.
This is essentially the same as my proposed setup, so this is good information to keep on hand for the (distant) future.
Ground PowerTop


Rear Baggage PanelTop


Panel
PanelTop
Here’s the latest panel idea. Go to the Cockpit Design page for more background.

Throwback to the old RV-7 Project:

I miss having CATIA at my disposal…
For the RV-8, I’ve been…
Switch LayoutTop
Go see my Cockpit Design page.

Now the facts:
RV7 – 3.5 feet is a great length for the LED strip. 3ft would be plenty.
Dimmer is highly recommended, use a lower wattage SMD3528 strip if using without a dimmer.
I bought 3 different LED strips to experiment:

Bottom line: I am very happy with the SMD5050 300LED/5meter or 18 per ft version of the LED light strip. At total of 15 watts, it provides plenty of light at a soft glow that impresses all who see it.
Fwd Baggage Access Panel to Instrument PanelTop
There are a lot of great threads on VAF about this, but Guy Prevost has an excellent picture here: https://vansairforce.net/threads/rv-8-instrument-access.27086/post-200616

Interior
Interior IdeasTop
If money were no object, I would go with a full up package from Classic Aero Designs. Here’s the Aviator Seat Package with Headrests.


Of course, then I am going to have the get the embroidery. How can you not splurge for this?

Pushrod Boots ($81). So no cold air enters the cabin from the wings.

And CAD also sells Hooker harnesses. 5 Point Harness Set with Rotary Buckle (non-certified) – $410 per Seat

Electric Seat Heater Set ($179).

Arm Rest StiffenersTop
The armrest stiffener mod is something a lot of people do.
Five Point HarnessTop I’m not sure which harness to go with, but I am sure that I want a five point setup. Here are the big hitters:
Removeable seat and baggage pansTop
I like the idea of having the seat pans and baggage floors removable. I know this means a lot of nutplates, but I think it would be worth it for long term upkeep, annual condition inspections, and any future improvements I may want to make to the airplane.
I need to look up the nutplate callout for the tiedowns. I’ll find those later.
After some research, I like what Bill Respucci has done for his ELT and strobe power supply.


Headset Jack LocationTop
There is plenty of discussion and hand-waving about where to put the headset jacks. Typically (pronounced “in some certified airplanes”), they are either on the instrument panel or beneath the panel (jacks pointing up). I don’t like that because now you have a cord dangling from around your neck, to your lap, or by your leg, and back up at or near your feet. It can get in the way of the stick, switches, controls, etc.
Ideally, the headset cords could go back behind you to a location that kept the cords from interfering with inflight crew duties, was tangle-proof, and allowed easy access in flight (assume you accidentally pull it out and have to re-plug your headset in).
Rick’s location here is interesting.

Ski/Golf Club BaggageTop
My RV-7 plans included some baggage access panels to make for ski/golf storage. Don’t know about the RV-8 yet.
More later.
CupholdersTop
I really want to do a set of cupholers in front of the fuel selecter.
On the RV-8, I really fell in love with this location here:

StorageTop
I’m planning to add a storage bin to the right side lower panel (same panel as the fuel selector on the left).

Rear Seat Booster with StorageTop

Airframe
Canopy LockTop
Having a single key for both the Canopy Lock and the ignition sounds nice. More about this in the stick-mounted starter button section.
Rocket Steering LinkTop
No big surprise here, the Rocket Steering Link seems to be nicer than the OEM Van’s link.
Rudder Cable FairingsTop
I like the custom rudder cable fairings. I don’t know if it decreases drag at all, but it sure makes the airplane look a little sharper from the rear. I did see a cable fairing at the Mid-Atlantic Fly-in that was mounted from the inside with a single #6 screw (into a nutplate attached to the fairing.) It looked really good, and I will probably mimic its setup.
Invisible Hinge Oil DoorTop
I can’t remember whose page I swiped this from, but I like the invisible hinge oil door. Here are a couple pictures for your viewing pleasure.


Update Sep 2025:
-
-
- The hinge is $46.95/Each from Aircraft Spruce here: Oil Door Hinge | Aircraft Spruce ®
- The latch is $46.50 each H5000-2 Flush Latch – New Surplus from Aircraft Spruce here: H5000-2 Flush Latch – New Surplus | Aircraft Spruce ®
-
Trim/Flap ControllersTop
The website has a lot of description, but I am looking to add a little control to the trim system on my airplane. TCW Technologies has a couple of interesting products. After doing some research on flap controllers, I’ve located FPS-Plus. Their website is here. Basically, a momentary push of an (ON)-OFF-(ON) switch will take you up or down to the next flap detent. Holding one of the buttons for more than one second goes all the way up or all the way down. Seems pretty slick to me, and allows for a backup flap switch and trim setting coupling based on flap setting. It needs some specific switches and some specific potentiometers for flap positioning, but still seems like a very cool addition to make (appears you can retrofit to an existing installation, too, so I can wait to install until after first flight).
Alternative Wheel Pants and WheelsTop
Dick martin from RVBuildershotline.com article: “Want 3-5 more knots? Martin recommends against the Van’s wheel pants design. go with the ones designed by the NASA guys, he says.”
I think the new style wheel pants are the pressure recovery pants, and are the “fast ones.”
More about wheel pants, though, Here’s a pretty nice way to attach them.

About wheels…someone on VAF just bought the Beringer wheels, and they look really nice.

I bet they cost a fortune.
Brake Fluid, Lines, PedalsTop
I read somewhere to use Loctite 567 (Teflon) sealant on all of the fittings.
Worried about brake fires, use ROYCO© 782 Synthetic Fire Resistant “Super Clean” Hydraulic Fluid, MIL-PRF-83282D. Stainless steel brake lines. (From Bonaco?)
If you shorten the rudder cable ‘links’ and mount the rudder bars a little more forward there’s no problem. I have had no problems so far in 160 hours and my pads look like they can go another 160 or more. I also installed auxiliary return springs on the master cylinders which I feel helps with brake life.
Can’t remember who said that, but I snagged this picture from Ryan at www.vansflyer.com/vansflyer. It’ll help remind me to do the spring trick on the brakes.
More on that, apparently the Matco cylinders have less play than the cleveland cylinders.
Here’s the parts list for the spring additions, care of LifeOfRiley on VAF:
RV Brake Spring Parts List
I used the following from McMaster Carr
(1) Pkg 6389K625
Nylon Bearing Flanged, for 3/8″ Shaft Dia, 1/2″ Od,
3/8″ Length, Packs of 5 $1.97 Pkg
(1) Pkg 9657K115
Steel Compression Spring Zinc-Plated Spring-Tempered, 3″
L, 1/2″ Od, .047″ Dia, Packs of 12 $5.29 Pkg
(4) Ea. 9946K13
Aluminum Set Screw Shaft Collar 3/8″ Bore, 3/4″
Outside Diameter, 3/8″ Width $1.82 EA.

Apparently, I should upgrade to the Grove brakes. (Twice the kenetic energy stopping power?) Get the magnesium wheels? Also, I could upgrade to the Grove master cylinders, which are adjustable and have stronger return springs. Something about switching from Nitrile to Viton o-rings. Nitrile is only good for about 275F, while fluorocarbon (Viton) o-rings hang in there to 450F. (-218 V75 (1.234 X 0.139) 2750 $0.17 – $0.50)
Also, from a post I stumbled across, do these:
1) The long bolt mod. Use (4) AN3-56 bolts as the axle of rotation for the rudder pedal instead of using 2 smaller bolts per pedal. Obviously having a single axle of rotation is better than (2) almost the same axles of rotation.
2) Return springs. These help the brakes return to the non-braking position. The mod calls for a spring, stop, and collar on the shaft of each master cylinder. I suspect the left brake was dragging, and I’m hoping this will help improve pad life. It’s an easy mod. See pic here. Part list required is here.
3) DOT4 conversion. There are a lot of threads on what fluid to use, including Mil-5606, Mil-83283, Synthetics, Dot4, Dot5, etc. I chose dot4 fluid due to its availability and resistance to fire. If you use dot4, the o-ring mod is required. You also need to use brake lines that are dot4 compatible. The lines that come from Van’s are not. Stainless Steel Aeroquip 666 will work. If you’re sticking with the MIL stuff, this is not required. I’m not necessarily pushing the dot4 mod. Thanks to Charlie Kuss for being THE source of O-rings to adapt all the brake components to support Dot4. He sent me a complete kit of O-rings with pictures. Replacing the O-rings is very easy.
4) I also was recommended not to use the default plastic brake lines between the pilot and pax, and that I’d be rewarded with brakes that aren’t as susceptible to becoming mushy. The line from the pax to the reservoir would still be the default plastic lines. I haven’t done this yet, but maybe next time I service the brakes I’ll remember to measure the lines and have the new fittings and hoses at the ready…
Dynamat Firewall insulationTop
I saw (in the March 2010 edition of the Minnesota Wing’s online newsletter) a small article about Dynamat. Looks like cool stuff. Here are a few quotes from the article by Doug Weiler.
The product is commercially known as Dynamat and is used for insulating surrounding automotive audio installations. It is only about 1/16″ thick with an aluminum foil front, sticky on the back, and in between is a very dense rubbery material.

I did a very un-scientific burn test and it would not support a flame (unlike the 3M ! foam which seems to burn rather handily). It cuts easily with scissors and I tried it on some test pieces. Once it is in place, the most amazing thing is that when you thump on the firewall on the engine side, it sounds like you are thumping a block of wood. It is a totally dead sound.
LightingTop
February 2018 Update:
I found the Flyleds stuff.
-
-
- DIY KIT: LED strobe and position lights US$249
- Tail LED-kit model US$99
- WigWag heatsink kit US$15
- The Skinny Boards US$1
- Wiring loom, Crimp plugs, US$149
-
August 2017 Update:
I like the AeroLEDS stuff. Now Thinking:
AeroLEDS Suntail $395
January 2011 Update:
After reading a little more, I’ve found that people who do the two lights in each wingtip dance aren’t happy with the amount of light they are getting from their landing/taxi lights. I thought they were talking about the regular halogen bulbs provided with Van’s wingtip light kit, and that the people who are using the HID wingtip lights are generally very happy with the light output.
After even more reading, I’ve decide that the leading edge light is really the way to go. Now, I think I am going to put a single HID (PAR 36 style enclosure, ordered from Duckworks) in each leading edge for landing lights. These won’t wig-wag. I went ahead and ordered a Raptor HID kit from DDM Tuning.
They had a whole bunch of bulb type options, and a $10 upgrade to 55W (from the $30 35W version.) You can also choose your bulb temperature. I chose 5000k based on the graphic they have.
To summarize, I ordered 55W, 5000K, H3 style bulbs. For $40, it’s worth trying these inexpensive HID lights instead of the $250+ lights from “aviation” companies.
Then, I’ll use the wingtip lights for taxi/recognition, with wig-wag. I can use the smaller MR16s in the wing, and point one set wide, and one set toward the centerline. If I use regular halogen bulbs in these, I won’t have to use a warm up circuit, which is good, considering that when up at cruise and ATC calls with a traffic alert, I’ll be able to immediately start wig-wagging them for recognition. That gets rid of my need for an automatic warm up circuit (won’t be using HIDs for wig-wagging).
I’ll figure out the mechanics of the wingtips taxi lights later (single light in each wing? 2 MR16 halogens in each wing?)
Here was my old scheme:
Two lights in each wingtip, fabricated in a similar way to Mike Bullock’s setup.
Instead of using two 50W HID bulbs in each wingtip, maybe I’ll downgrade one set to the 35W for Taxi (which will still be a ton of light output) or try to downgrade further to regular halogens, positioned so they light up as much area as possible.
I will keep one set as 50W HIDs and use them as my high powered landing lights.
Now I have to figure out how to flash them. Apparently they need some warm-up time, which can either be procedural, or by circuit. Hmm. I’ve read a little about XEVision. They have a 25 second delay on the flashers. I feel like I could make my own, though. We’ll see.
Check http://www.strobesnmore.com/index.php?cPath=15
Just for posting’s sake, here are some pictures of what I am after:


Tailwheel IdeasTop
I’ve see the Vince Frazier tailwheel (for use with a fairing), but I like the looks of the Doug Bell tailwheel a little more.
I do plan on doing the tailwheel fairing at some point, so I need to make sure both are compatible.

MapboxTop
There was a posting this weekend on a cool place to include a mapbox.

Here’s Rick’s version of a mapbox, behind the pilot. This would also be a good place for the RV-8 box pictured above, with a closure.
PolishingTop
From PerfectPolish.com:
Suggested Order of Use on Average Skin:
1. Compound with C, F7 or G6
2. Cyclo with F7
3. Cyclo with S
Covers/Hangar JammiesTop
Saw this on an email list:
I’ve used AviationCovers.com out of Arlington, Washington and have been extremely happy. They just made a set of Hangar Jammies for the RV-7 and they’re great. My “traveling” strap on canopy cover is light enough but weather resistant. It covers the tip up hinge opening area as well and keeps things dry. Got to get it tight, though, or it flaps.
Cap Screws for the Fuel Tank Access PanelsTop
More from Bill…
The other tip I have is to order a bunch of stainless 8-32 ½” cap screws from McMaster-Carr and use them to secure the cover plate for your fuel tanks. Once the wings are installed, I doubt you could get the pan head screws off but the cap screws will be easy to remove. See this picture:

Tinted CanopyTop
Tinted Canopy
From a VAF post in 2009:
Ken: I have a darker than standard tint on my -8. Keep in mind the following occurred in 2002 before Todd’s Canopies was born.I called Vans to ask about a tinted canopy. I was told that they only sell the one color — clear. They did not sell darker tints because (according to Vans) they are not legal for night VFR flight. However, the person I spoke to gave me the telephone number for the company that makes Vans canopies. I can’t remember who that is but I’m sure Vans could tell you. I called the canopy maker (very nice folks), and they sent me samples of darker tints. The one I chose is the next darker up from Vans. Its number is 2514. The canopy maker told me that the tint is perfectly legal for VFR night flight. It is the preferred tint for many other experimental kits and is used by Piper in some of their aircraft.The canopy maker was coincidentally preparing a shipment to Vans and told me if I ordered it right away they could add it to that shipment and then Vans could put it in my finish kit. That’s exactly what happened and a few weeks later I had my finish kit complete with tinted canopy. Vans credited me the original canopy and charged for the new one. The up-charge was about $55.Regarding night flight. I must admit that I have flown very little at night with my -8. When I have, I have not noticed any problem. I have heard very good things about Todd’s canopies, and I especially like the idea of the extra thickness in them. If I were building today, I would probably go the Todd’s route.
Chris
and
There is a spec for the amount of light that can be let through from one side to the other. I do not remember it right now but it was a long time ago. I think it may be on the order 72-75%. This is for Mil. aircraft so you are safer flying at night as well as in the day time. Vans will sell you one, I think one shade lighter than that or clearer. We just contacted the O.E.M. of the canopy and had him make us one to max Mil. tent spec. They did not charge any more for it and sent it to Van”s and Van’s put it in with our kit. Yes south TEXAS has a lot of SUN in the summer too……”)
Parking Brake IdeaTop
So I’m starting to research parking brakes, but I’m not positive I want a real Matco Parking Brake.
What if instead, I did someting like the DroMight Rudder Lock.
What if I could make something that pushed on the brake pedals?

Control LocksTop
I saw these recently on VAF, and love them. Instead of $27 ones from a retail place, I’ll just make these.


Gear Tower ModTop
There is a gear tower mod when addressing the access issues to attach and torque the gear bolts on the taildragger version of the RV-8.
“I used the same thickness material for the cover plate, 18 platenuts and AN515-8 screws per side if I recall correctly.”


Or, leave as is and address the access issues another way:
1. Use Rocket-style tank vents in the wing roots, getting rid of the vent lines and making the cockpit safer by avoiding unnecessary potential for fuel/vapour ingress.
2. Install the landing gear bolts with heads in gear towers and nuts underneath, so they can be torqued from outside the aircraft.
3. To hold the bolt heads while torquing, either use retaining clips described at https://vansairforce.net/community/showpost.php?p=1527424&postcount=10 and
https://www.rv8-hangar.com/gear-bolt-mod/ or use a modified ring spanner. (“The original bolt was a close tolerance NAS6206-27 bolt. I ordered a NAS6606-27”)


4. Use flexible brake lines from TSFlightlines which can be arranged to improve access to the gear bolt heads.
Bigger WheelsTop
There are several threads here on VAF about using the 380-150×5.00 tires, which are the largest size tires that fit on the standard 5″ wheels. I have these and I am very happy with how much they improve the handling and feel on dirt/sand/grass.
They fit with only minor modifications to the standard wheel fairings. I mounted my wheel fairings a 1/2″ higher than the guidance in the plans, and this created the needed room. In doing so, there was interference between the wheel fairing and the brake caliper, which required a cut-out and a “blister fairing” over the cut-out. I have the mold for those blister fairings (wheel pant bulge) and they are sold through HP Aircraft LLC (an advertiser here on VAF) for $45 a pair. The larger tire also requires a larger opening in the wheel fairing, of course. I think I might have lost 1 kt of cruise speed. Here is a picture of the 380-150-5.00 tire with my wheel fairing and blister fairing:
“Along with our aluminum airfoil gear legs, we offer carbon fiber wheel fairings for “full-size” 6.00-6 tires. Matco and Beringer offer 6 inch wheels & brakes are compatible with the 1 1/4 inch axles that are used on RV-8.”
Rudder Pedal ModTop
There’s a few versions of the rudder pedal mod in order to reduce inadvertant brake application with rudder application. Here are a few picture ideas.


Another one:

Gross Weight IncreaseTop
Van’s gives two GW for the RV-8: 1600lb for the 6g aerobatic category, and 1800lb for the 4.4g Utility Category.
This means that at the aerobatic weight 1600lb and +6.0g, the wings (airplane) can carry 9600lb at limit load, and will break at the ultimate load of 14400 lb.
Similarly, at the utility weight of 1800lb and +4.4g, the wings (airplane) can carry 7920lb at limit load, and will break at the ultimate load of 11880 lb. (I think the 4.4g could be sustained a higher weights, up to 2181 lb GW (9600lb divided by 4.4g), but we shouldn’t just pick the utility limit factor to extrapolate.
With the potential for additional fuel tanks, if we wanted to extrapolate to above 1800lb, let’s use the even more conservative Normal category limits. Let’s assume at 1800lb we restricted ourselves to “normal” airplane loads (+3.8g). At 1800 lb gw with the normal limits, the wings (airplane) can carry 6840 lb at limit load, and will break at the ultimate load of 10260 lb. This assumption restricts higher gross weights to 71.25% of what the aerobatic category allows. (For structures folks, this is factor of safety of 1.4 ON TOP OF the factor of safety of ultimate over limit.
So, let’s use 9600lb limit load for aerobatic up to 1600 lb GW, 7920lb limit load for utility up to 1800 lb GW, and 6840lb limit load for a “normal” category aircraft.
The small W&B survey of RV-8s I performed last fall yielded an average empty weight of 1085, with a max of 1150lb. Let’s assume I’ll get itt done for 1100lb. Lets call me and a passenger 400lb, with 100 lb baggage and 42gal (252lb) avgas, I’m looking at 1852 lb. What if it’s 84gal (504 lb) avgas? That’s 2104lb.
If we find the max limit load factor allowable at 2100lb using the 6840 lb limit load from a normal (rather than utility) at 1800lb, we find that the positive limit load factor at 2100lb should be 3.25g. That’s a lot for being 300 lb over Van’s suggested 1800 lb GW. Adding another 1.5 factor of safety of that yields 2.1g, which would be a fine limit for overweight ops.
Definitely needs more thought. I bet we could also solve some performance problems to find a more operationally limit weight.
For instance, Vans is saying that the stall speed at 1800lb is 58mph (or 50kt). Common corrections for stall speed as a function of weight: VS = VST times the sqrt (W/WT). This equation yields about a 4 knot increase in stall speed (to 54 knots). That moves VREF from 65kt to 70kt.
Landing loads.
Per 14 CFR 23.473, landing gear loads were likely considered at 8.7 fps at GW, If I use 2100lb instead of 1800 lb, the loads would have had to meet 9 fps. Not a big change, but conservatively, we could limit the aircraft to landing sink rates of 7.45 fps. (this is 447 fpm). A 3 degree glideslope requires about -500fpm for each 100kt groundspeed. A 65kt VREF aircraft would be descending at 325fpm. If you didn’t flare, you’d slam into the runway at 72% of a reasonable new landing load limit.
Design Airspeeds:
The minimum design cruising speed is 36 sqrt(1600lb/116sqft) or 133 KCAS. For the utility weights, it would have been 129 KCAS. If we spot-check the new weight, our normal aircraft min VC would be 33*sqrt(2100/116) of 140.
VA is 144 for the RV-8, so all VCs are less than VA.
Here’s my first draft at a load factor limit:

MISC
Tail LifterTop
Found this on VAF:

Or just…

Fuse Skin Rivet OrderTop
Recent VAF thread about the -7 instructions being better than the -8 instructions for some fuse skin rivets near the spar opening. I have no idea what they are talking about, but it seems like this saved some folks a bunch of time…

OtherTop
Here’s a running list of other things I might want to do that I haven’t really researched yet.
-
-
- Grove gear legs, especially the standard ones, offer great weight savings as a simple “switch” from the Vans legs.
- Grove brake fluid reservoir.
- Add stiffeners to the floor of the tailcone in the two bays aft of the baggage bulkhead.
- It goes against my nature to cover anything up permanently. That is why I made all floors and even the smallest fiberglass fairing tip removable with screws and nutplates.
- If I had to do it all again, I would pause every time I saw a callout for flat “K1000” nutplates — and ask myself if it might be easier and more appropriate to use a “K-suffix”
dimpled nutplate, such as the MS21047L08K illustrated below. - I will make a blanking plate for the NACA duct under the wing, and install nutplates in the skin panel to hold this blanking plate in place
- Wider hinge material for the flaps.
- Additional access panel in the bottom of the baggage floor to give easy access to the brake master cylinders. Wish I had done this.
- RV-8 gear tower mod. I was on the fence and left them stock. What a pain to work in there once you fill it full of wire and fuel lines. Would be much easier to have a larger opening.
- Add a storage bin to the right side lower panel (same panel as the fuel selector on the left) I did this and use it all the time. Very handy.
- Removable passenger stick. I did this and like it. Also enclosed the stick area on the rear stick with a panel cover from oregon aero.
- Move the fuel filter outside to the wing root for easy servicing. No more leaking fuel inside when you remove the filter for cleaning.
- 8A boarding step even on the -8.
- #8 screws for the baggage compartment.
- Cut floor around the flap blocks so removable floors are easier.
- Rudder cable attach holes. The bolts start enlarging the holes. Interestingly enough, the RV-3 plans show bushings installed from day 1 ? many have done that on the newer RV?s, and now the Val has them as well. Ordered 3/16? ID x ?? OD bushings from McMaster and cut them down to a little longer than the arm was thick. Drilled and reamed the holes to 1/4:?, used a C-clamp to press them in, then a sanding disk on an angle die-grinder to bring them down flush. Should be good for a while.
- John Huft Hidden Baggage Door hinge idea.
- Pop Out Handle Mod.
- Canopy pull handing on rear skirt.
- Rudder pedal extensions
- 1 lb Halon extinguisher mounted on forward portion of fuel pump cover (with racing style “loops” w/ quick release pin)
- Custom cover for forward portion of flap actuator, courtesy of Classic Aero (covered in leather to match full Aviator interior)
- Custom cover for canopy interior side rails, to cover the rivets, with leather from Classic Aero, to match interior
- Locking push-pull cables with laser engraved labels (Red for alternate air, blue for oil cooler, black for cabin heat)
- Smokin’ Airplanes smoke oil system
- Aithre CO detector feeding directly into Dynon Skyview system…can’t recommend this highly enough. Great addition!
- Screwless spinner, one of my favorite parts of the whole airframe
- Van’s oil cooler shutter
- Clear brake fluid reservoir
- High-temp (blue) Adel clamps
- Brakes: braided steel flex line for the “loop” around the gear legs at the bottom
- Wheels/tires: replaced the axle nut with the ones that have the hole in them, and the removable bracket, to take that jack that uses a bottle jack and the steel rod into the gear leg
- Internal aileron stops
- Internal rudder stops
- Fuel drain port fairings
- Fuel vent port fairings
- Recently added just because they look fun…the RV Printed Parts rudder clevis fairings 🙂
- Safe-air1 pitot/static/AOA lines and fittings…zero leaks anywhere from day one, knock on wood 🙂
- Sikaflex for canopy and aft window, albeit with Hylocks where the screws would have gone (to avoid having to fill holes, and they look like rivets from the outside :))
- SkyBolt canopy fasteners
- FOT grounding busses, and everything returns ground to one of those two busses. Result: no ground loops, zero headset noise.
- Instead of a homebuilt (or now Van’s-available) ADAHRS mount, I used two pieces of angle between the longerons aft of the baggage bulkhead and mounted mine there.
- Van’s ELT mounts L (ELT) and R (Dynon ADS-B electronics box)
- Clik-Bond mounts of various styles used throughout the airframe for wiring harnesses
- For other ideas, here’s what I deleted from the Van’s standard fuse order:
– Tail wheel assembly
– Gear legs and their brackets
– Brake fluid reservoir & brake master cylinders
– Fuel selector valve
– Fresh air vents (the plastic ones)here’s what I added to the order:
– Rear seat rudder pedals
– In-Flight adjustable front pedals
– Static air kit (not sure I’ll use theirs, but I have it)
– Manual aileron trim (not sure I’ll install it)Here’s what I bought from the Van’s store:
– Assorted nutplates, screws and rivets (for removable floors & gear leg towers)
– 12 1/2 X 16 inch 0.040″ aluminum sheet (to modify the gear leg towers)
– Rear throttle quadrant
– The tail wheel mount WD-409 (you will have to drill it)
Don’t forget to order the fuel pump and filter you need for your engine.
Don’t forget also the throttle quadrant, it’s not included in the kit.Here’s what I ordered elsewhere:
From Flyboy accessories
– Screaming Eagle complete tail wheel unit
– Van’s type tailwheel tapered rod spring (needs to be drilled)
– RV Rocket Steering Link
– Deluxe tail wheel tire
– Sliding Canopy Automatic Latch with two stops
– Sliding Canopy Lock
– Internal Rudder Stop
– Rod End Bearing Tool
– EXPERIMENTAL vinyl graphic
– Waterproof WarmSeats Seat Heaters (for winter in Canada…)From Aircraft Spruce
– Steinair Aluminum Eyeball Vents
– The AeroElectric Connection book
– Torque seal
– Stainless Steel cabin heat box
– Vertical Power VP-X Pro and wiring
– Andair duplex fuel valve (should of bought it from Andair directly)
– 3M Fire Barrier+ 2000
– Extra 3/8″ tubing and fittings etc, for the fuel systemFrom Protek (going electronic fuel injection & ignition)
– Dual fuel pump module
– 10 micron fuel filterWill buy from Grove Aircraft
– RV-8 Airfoiled Lightweight Gear
– Brake Master Cylinders with Integrated Reservoirs
– (possibly) RV Upgraded Wheels and Brakes
-